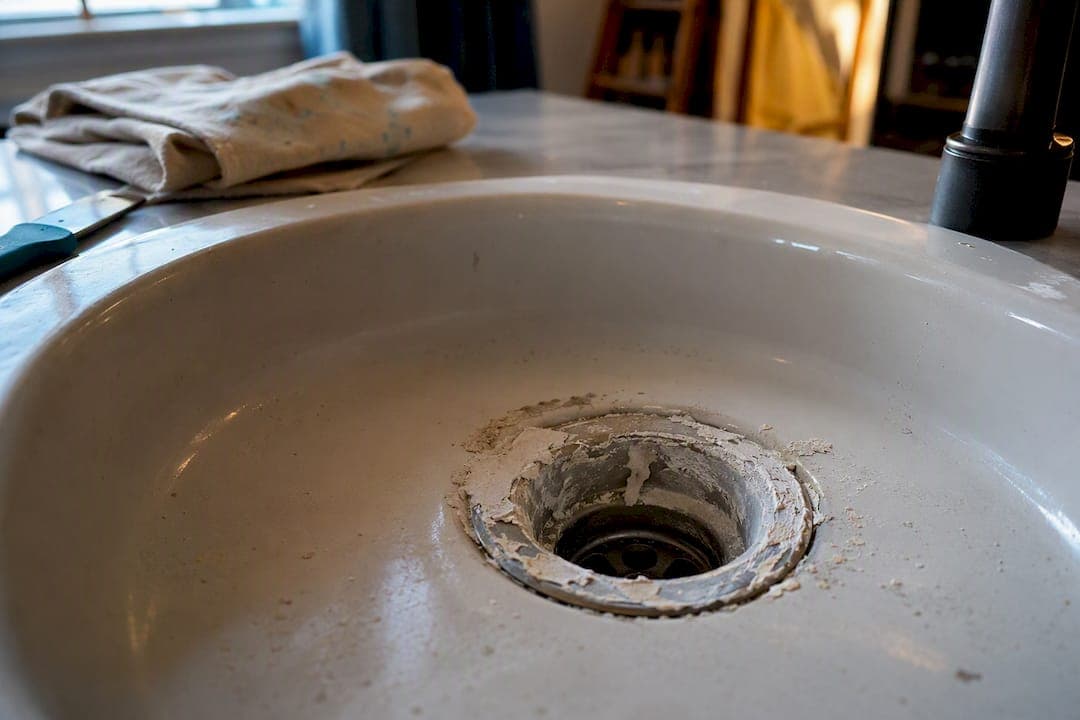
Rinsing a brush with a trace of leftover water-based paint is generally fine, but nothing more than that. Bulk paint, wash-up water thick with pigment, and any oil-based product should never go near a sink drain. Paint solids and binders harden inside pipes, and solvents in oil-based paint make matters worse. Wipe and scrape excess paint into the tin first, then use a bucket method for the rest.
TL;DR:
- Rinsing leftover water-based paint in small amounts is generally safe, but oil-based paints and solvents should never go into the drain due to their hardening effects.
- Paint solids settle and bond inside the P-trap, gradually narrowing pipes and causing slow drainage or blockages over time.
- Proper cleaning involves scraping excess paint into the tin and using settling buckets with strainers to remove solids from rinse water before disposal.
- Dried latex paint can be safely disposed of by drying it out with absorbent materials, while oil-based paints require hazardous waste collection.
- Early intervention with professional jetting and CCTV inspection is recommended if a sink remains slow, as paint buildup behaves like a plastic lining that resists DIY methods.
Table of Contents
- How paint causes blockages in sink drains and pipes
- Water-based vs oil-based paint: which is riskier for your drain?
- Cleaning paint tools without blocking your drain
- Getting rid of leftover paint, sludge, and rags
- What to do if paint has already clogged your sink
- Why hardened paint is one of the trickier call-outs
- Booking a drain specialist for a paint blockage
- Where to check the rules and get further guidance
- Sources
How paint causes blockages in sink drains and pipes
The trouble starts in the P-trap, the curved section of pipe under your sink that holds a small amount of standing water. Paint particles suspended in rinse water don't just wash away with the flow. They settle in that curve, where the water sits still long enough for pigment and binder to bond to the pipe wall.
Once that happens, the deposit behaves less like sludge and more like a thin skin of dried paint, similar to what forms on the inside of an old tin. Every subsequent rinse adds another layer, narrowing the pipe gradually until water struggles to pass at all.
- P-trap sedimentation: solids drop out of suspension in the low-flow curve and accumulate over repeated rinses.
- Binder adhesion: acrylic and resin binders cling to pipe walls, then catch grease, hair, and food debris.
- Solvent coating: oil-based products leave a tar-like film that resists water and hardens further.
- Septic impact: paint binders and biocides can kill the bacteria a septic system depends on, potentially damaging the leach field beyond repair.
This is why a "small amount, surely it's fine" habit repeated over several painting projects often ends with a fully blocked sink drain, months after the last coat was applied.
Water-based vs oil-based paint: which is riskier for your drain?
Check the tin. If cleanup instructions mention soap and water, you're dealing with latex or acrylic paint. If they mention mineral spirits, white spirit, or a specific solvent, it's oil-based, and the rules change completely.
- Water-based (latex/acrylic): lower risk in tiny quantities, but still contains binders and additives that build up with repeated rinsing, especially with heavily pigmented colours.
- Oil-based: must never be rinsed into a drain. Guidance across plumbing and DIY sources warns that oil-based paint and solvents form tar-like residues that set hard inside pipes.
- Rollers and trays: these hold far more residual paint than a brush, so even "water-based only" cleanup can send a surprising volume of solids down the drain if you rinse them directly.
Treat any oil-based cleanup, including solvent-soaked rags and thinner, as hazardous waste from the outset.
Cleaning paint tools without blocking your drain
Cut the risk at the source, before water ever touches the brush. Wiping and scraping excess paint back into the tin first removes most of the pigment load that would otherwise end up in your pipework.
- Scrape first. Drag the brush or roller against the tin's rim, then wipe with a cloth or newspaper, until only a thin film remains.
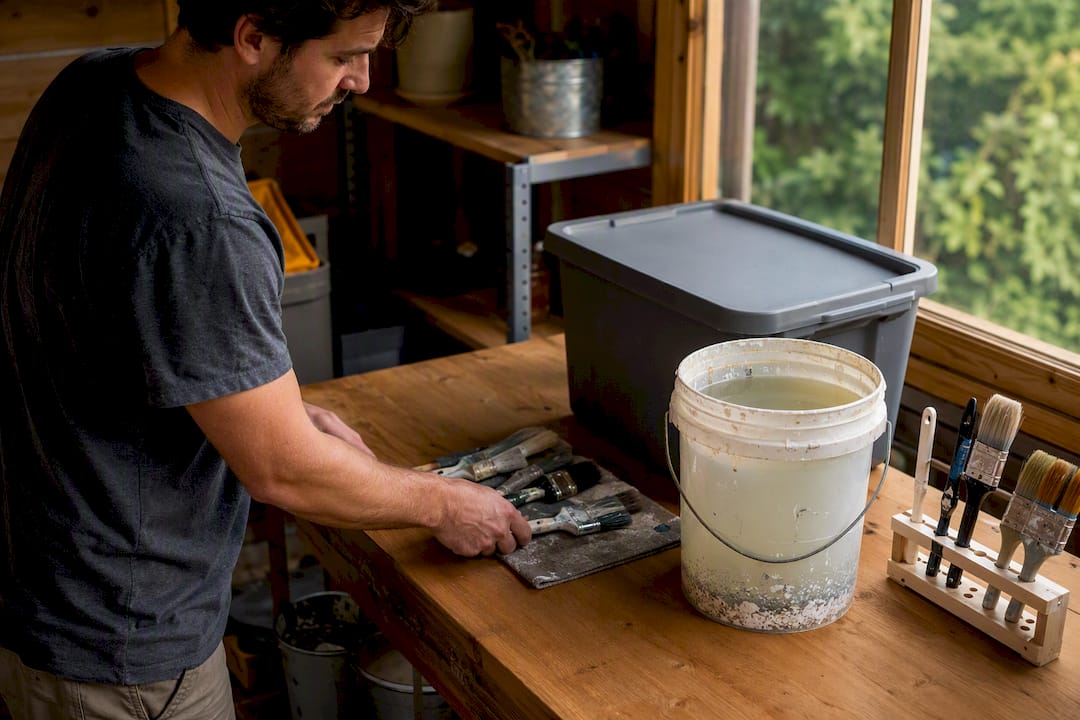
- Set up two buckets. Fill one with warm soapy water for the first wash, and a second with clean water for the final rinse.
- Agitate, don't run water straight through. Swirl the brush in the wash bucket rather than holding it under a tap, so paint stays contained.
- Let it settle. Leave both buckets undisturbed for a few hours so solids drop to the bottom before you do anything with the water.
- Strain before you decant. Pour the clear top water through a fine mesh strainer or an old pair of tights into the sink, catching any remaining solids.
- Dispose of the sludge separately. Scrape settled solids into a lined container, let them dry, then bin or take to a waste site depending on paint type.
For oil-based tools, skip water entirely. Clean with the correct solvent over a sealed container, and dispose of both the dirty solvent and any rags through hazardous waste collection.
Pro Tip: Keep a dedicated "paint bucket" in the shed for every job. Reusing the same settling bucket means you build a habit rather than relying on memory when you're tired and just want the brushes done.
Getting rid of leftover paint, sludge, and rags
Dried paint is far easier and safer to dispose of than liquid paint, so drying it out is usually your first move.
- Dry latex paint before binning. Stir in cat litter, sawdust, or a commercial paint hardener until it's solid, then most councils accept it in general waste, though it's worth checking local rules first.
- Never dry and bin oil-based paint. Take it, still liquid, to a household hazardous waste collection point.
- Use it up or give it away where you can. Half-empty tins are often welcomed by community reuse schemes before they become a disposal problem at all.
- Handle contaminated rags with care. Oily rags can spontaneously combust as they dry, so seal them in a metal container with water or take them to hazardous waste rather than leaving them in a bin bag.
Clearway Recycling's disposal guidance is a solid starting point for confirming what your local waste site will and won't accept.
What to do if paint has already clogged your sink
If water is draining slowly rather than not at all, you may still catch this before it needs a professional. Move through these checks in order rather than reaching straight for chemicals.
- Flush with hot water if the paint went down recently and hasn't had time to fully harden.
- Try a plunger to dislodge a fresh, soft blockage before it sets.
- Remove and inspect the P-trap. Place a bucket underneath, unscrew the trap, and check for a hardened paint layer or a solid plug.
- Clean or replace the trap if you find buildup, then reassemble and test with a slow trickle of water.
- Stop if the clog persists or if you find hardened resin further down the pipe than you can reach.
Avoid caustic drain cleaners on a paint clog. They rarely dissolve dried paint effectively and can create a hazardous mix in a pipe that's already partially blocked, without shifting the actual problem. If a sink stays sluggish after several attempts, if odours persist, or if you simply don't have the tools or confidence to remove the trap, that's the point to bring in a blocked drain specialist rather than keep guessing.
Why hardened paint is one of the trickier call-outs
Paint clogs aren't like your average kitchen sink blockage, and it shows the moment a camera goes down the pipe. Technicians using CCTV inspections routinely find paint adhered well beyond the P-trap, coating sections of pipe the homeowner never suspected. Once it's set, it behaves more like a plastic lining than sludge, and a plunger or a bottle of shop-bought drain cleaner won't touch it.
High-pressure jetting shifts that lining where mechanical tools and chemicals both fail, which is why a fast response matters. Left for months, a thin paint film narrows the pipe until ordinary debris, hair, food scraps, grease, catches on it and turns a slow drain into a full blockage. The homeowner's checklist is simple: never rinse bulk paint or rollers straight into a sink, settle rinse water in a bucket first, and call a specialist the moment a sink stays slow for more than a day or two. Catching it early is almost always cheaper than waiting for a full blockage.
— Christopher
Booking a drain specialist for a paint blockage
If your sink is already running slow, or a plunger and a cleaned-out P-trap haven't fixed it, this is where DIY reasonably stops. A practical alternative to guessing your way through a hardened paint clog is to hire a specialist offering fast response, high-pressure jetting to clear resin bonded to the pipe wall, and CCTV inspection to confirm nothing further down the line has been missed.

Fixed, transparent pricing means no surprise costs once the job's underway, and calling early, at the first sign of a slow drain rather than a full stop, generally means a smaller, cheaper job than waiting for a complete blockage. The service provider covers Ellesmere Port, Wirral, Chester, and the surrounding areas. If your sink is struggling right now, get in touch through the emergency drain unblocking page, or check the full drainage services overview if you'd rather understand the jetting and CCTV process before you call.
Where to check the rules and get further guidance
For disposal rules and further reading, see Clearway Recycling's paint disposal guide, Grist's explainer on pouring paint down the drain, and The Waste Group's guidance on septic-system risk. If you'd rather find a vetted local tradesperson, HEPHIR's verified plumbing directory is a useful starting point.
Sources
- How to dispose of paint | Clearway Recycling
- Is it really OK to pour paint down the drain? | Grist
- How to dispose of paints | The Waste Group
- Engineerskill